Gum Leaf Triptych
Apparently I make art now! A few years ago we were given this slab of huon pine, which was lovely.
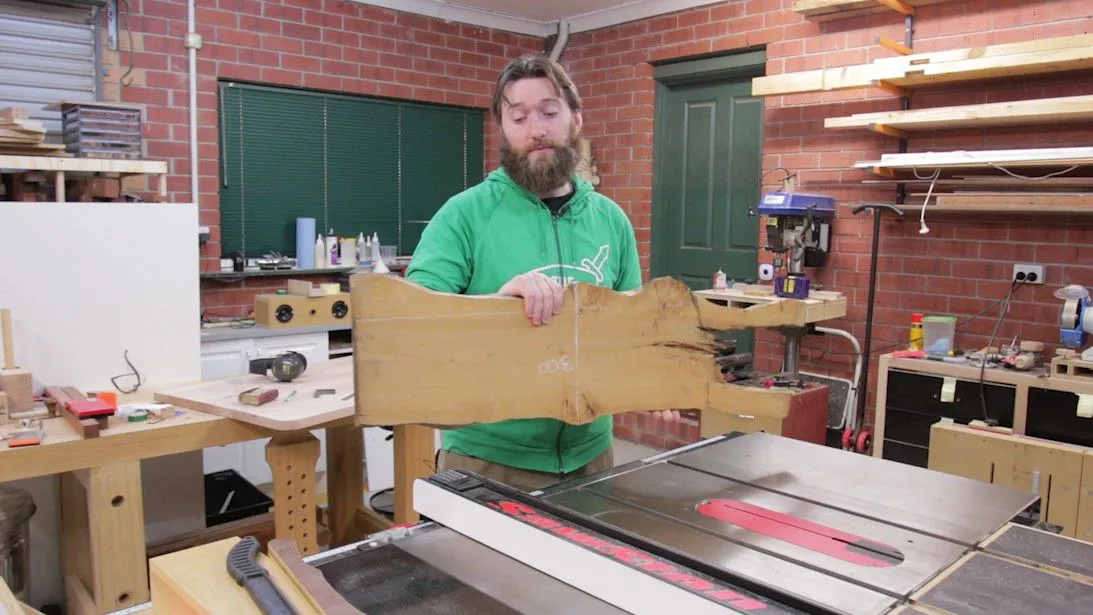 Original slab size – awkward at best, too small for a coffee table. Measured in about 300 x 700 of ‘usable’ material, then another 200-300mm of crap. Awkward me for scale.
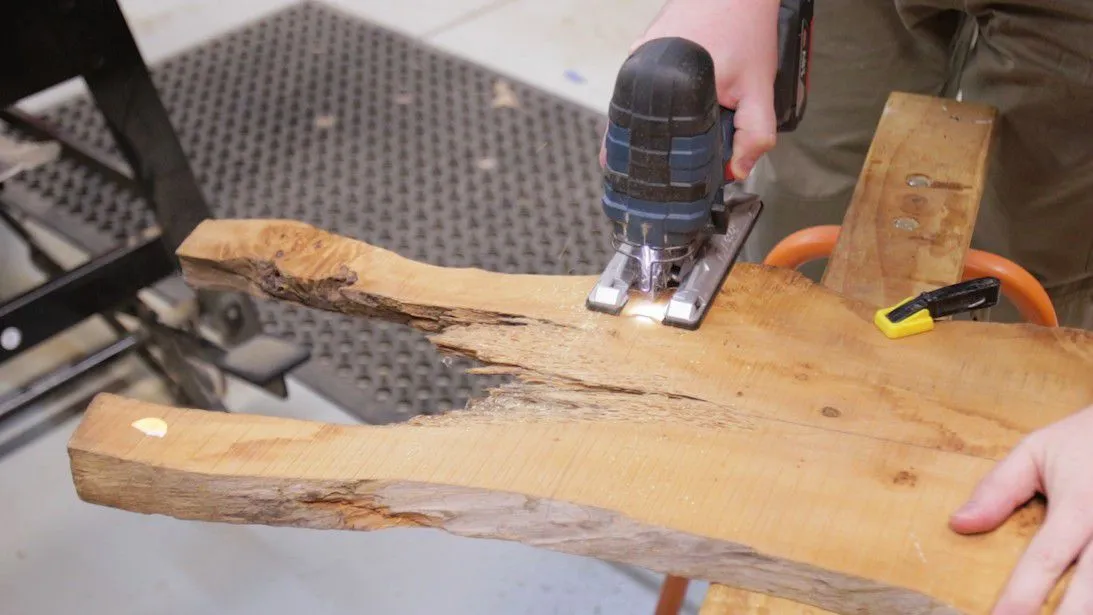 Jigsaw took care of the crap/unusable section very easily.
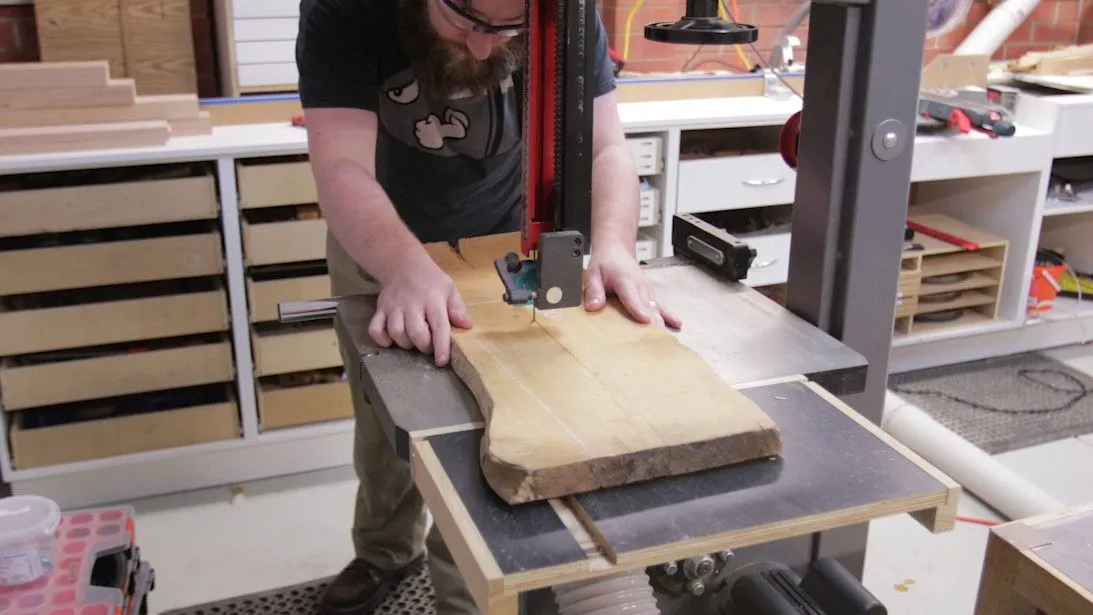 Switched to a bandsaw to rip it down the middle. This could have been done with a jigsaw – it’d just leave a wider kerf. Mine went flat after the cut above because I forgot to charge it. This was just down the middle, the actual dimensions are always going to vary depending on the slab you find.
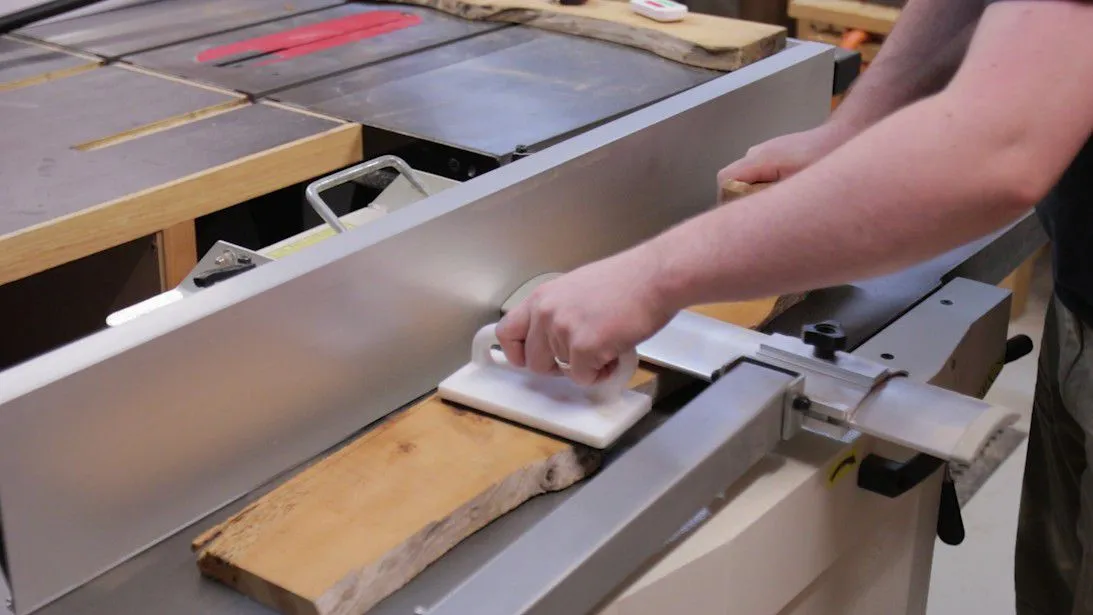 Lots of cupping/twist in the board, so a pass or five over the jointer was required. A router/slab flattening jig would also work, but would be more work.
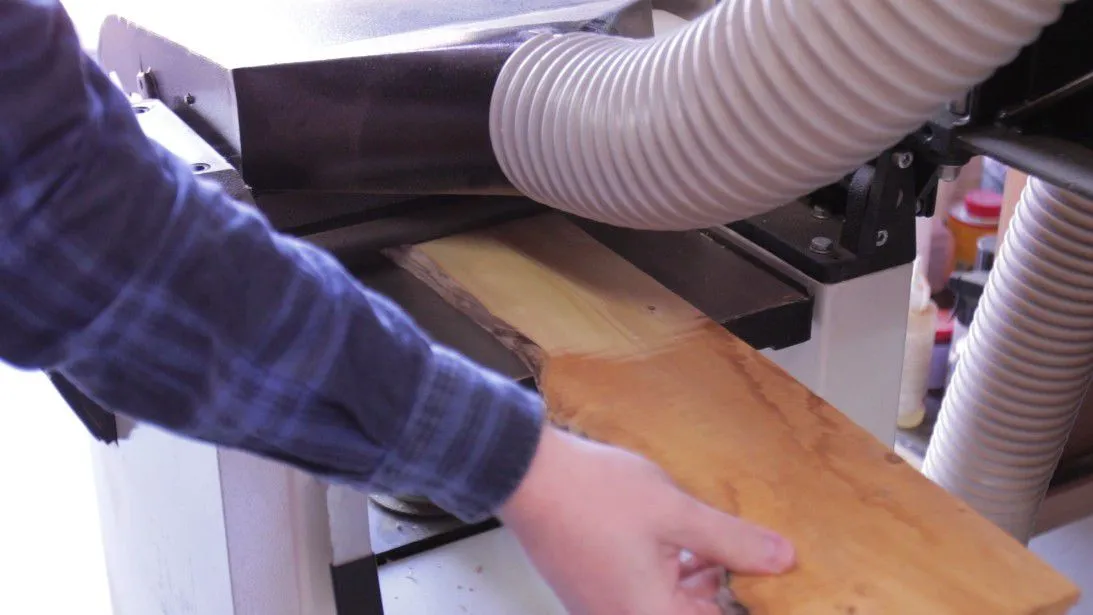 Reducing it to final thickness – the golden roughsawn/oxidised layer being removed for the clean lighter yellow
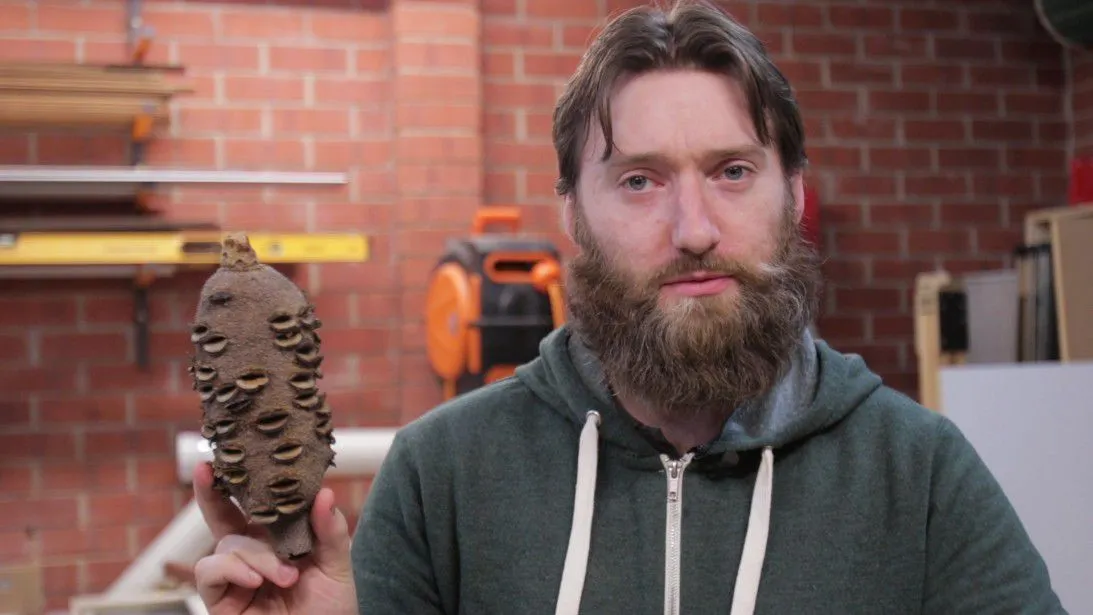 Banksia nut (with awkward me for scale again, I need new props). These are massive nuts/seed pods. The seeds burst forth when the seed is exposed to fire. Explosion time!
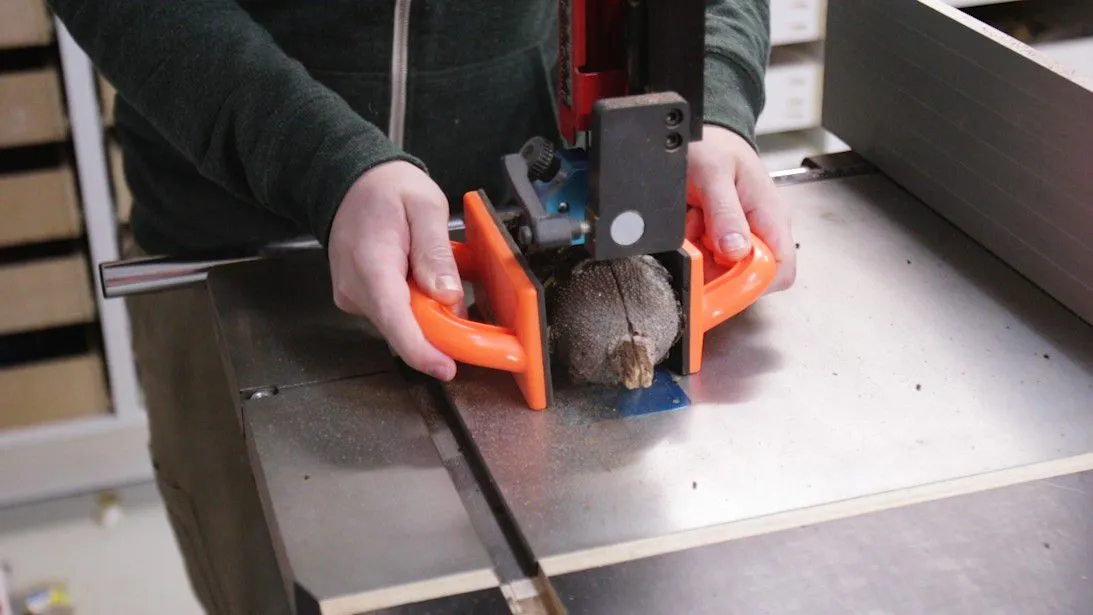 Slicing it in half on the bandsaw-
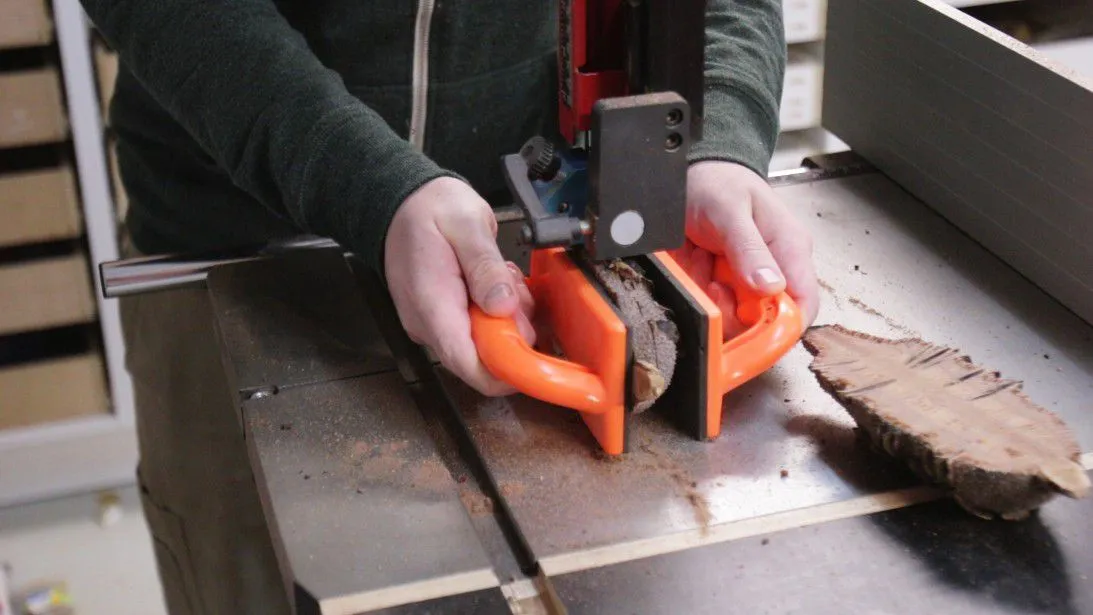
- then ‘slabbing’ it to put in the epoxy. Despite the hard (and sharp) exterior, these cut really easily. They can be pretty crumbly near the edges, so take caution of that if you try and do thin slices.
 Melamine scraps were used for the form. You want something that the epoxy won’t stick to. Turns out I had a lot of melamine scraps left over from the mitre saw station build!
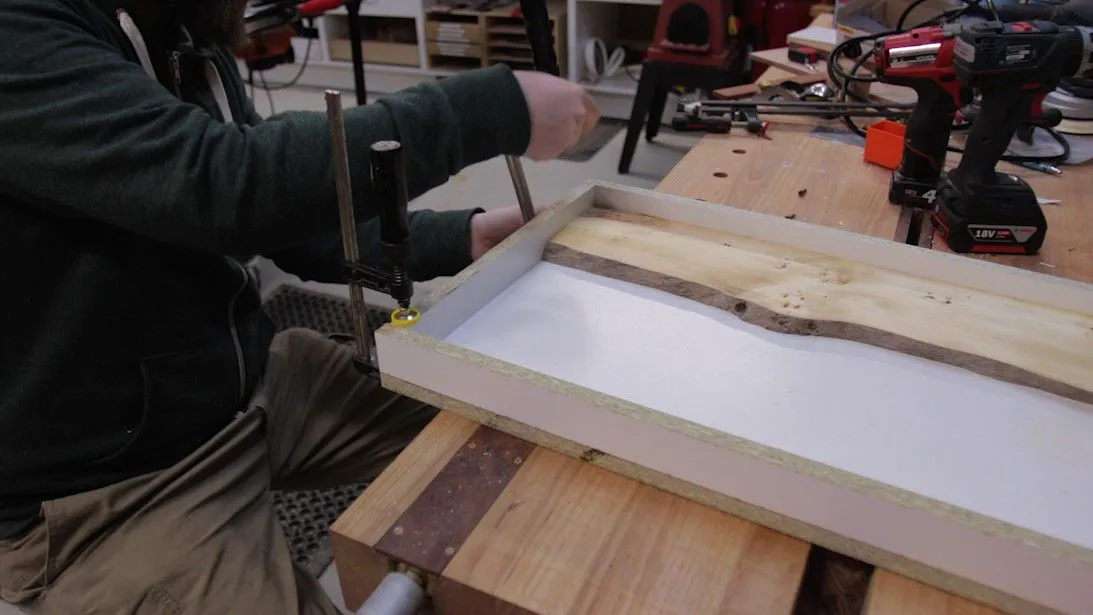 I used the slabs to arrange the pieces of the form so that there was no epoxy at the ends.
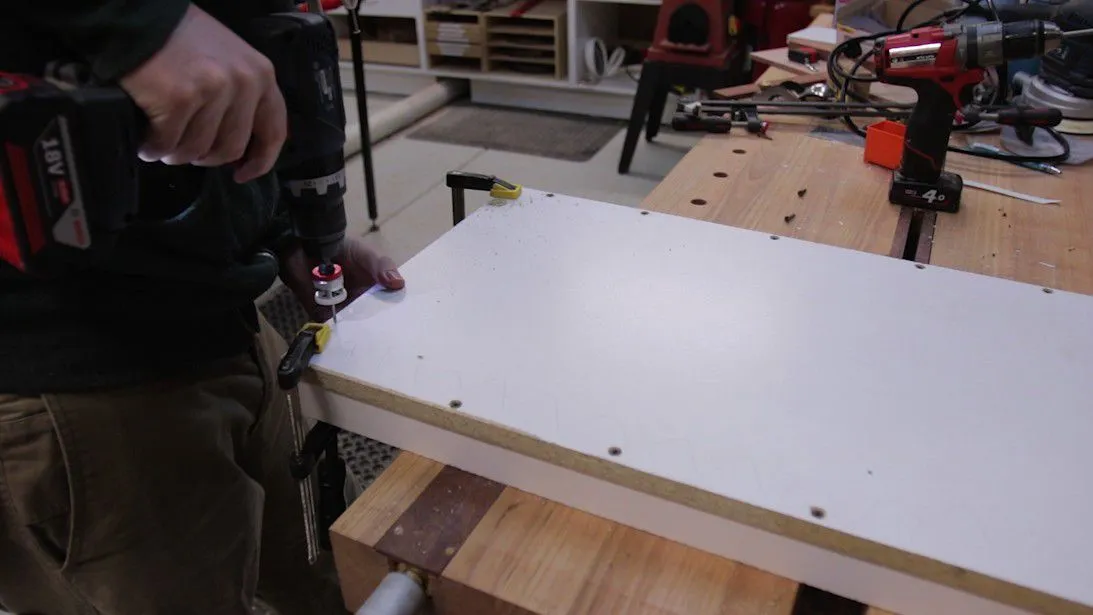 Then I flipped and added screws. Lots of them. I found it worked better screwing the sides into the base first, then into each other. That stopped any minor twist that messed with alignment and caused tiny tiny gaps in the test piece I did.
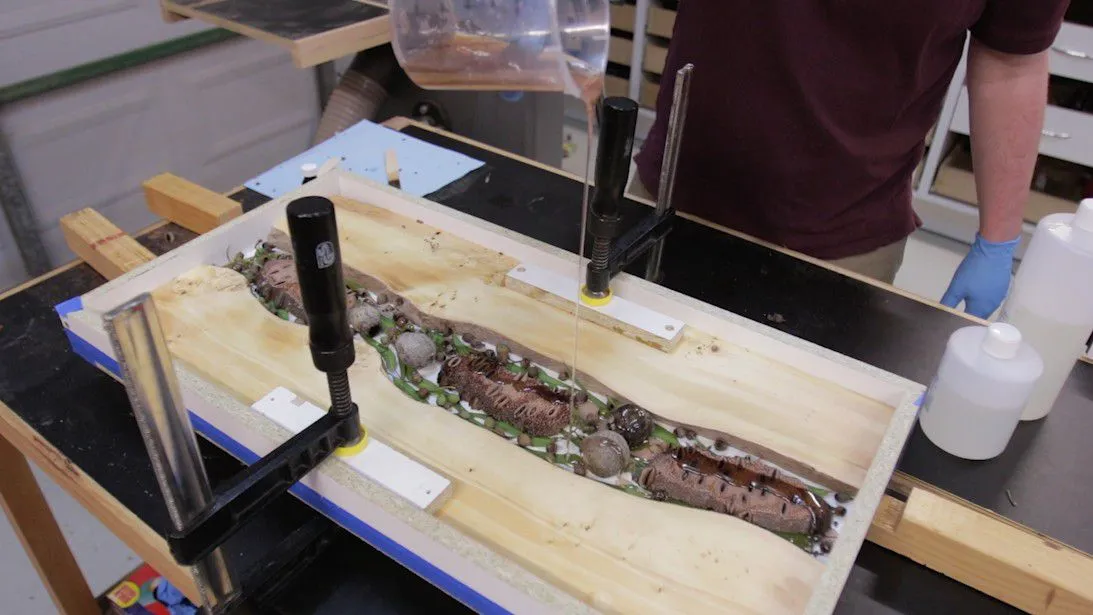 First layer of epoxy was nice and shallow to stick things down so they didn’t float away. The melamine form was also waxed to help with releasing the form afterwards (it worked great).
Use digital scales, be as accurate as possible. I used Barnes EpoxyCast, its a 2:1 mix. Get it as close to accurate for the best results. Pour from 10cm distance minimum so it flows better, pops bubbles on the way, etc.
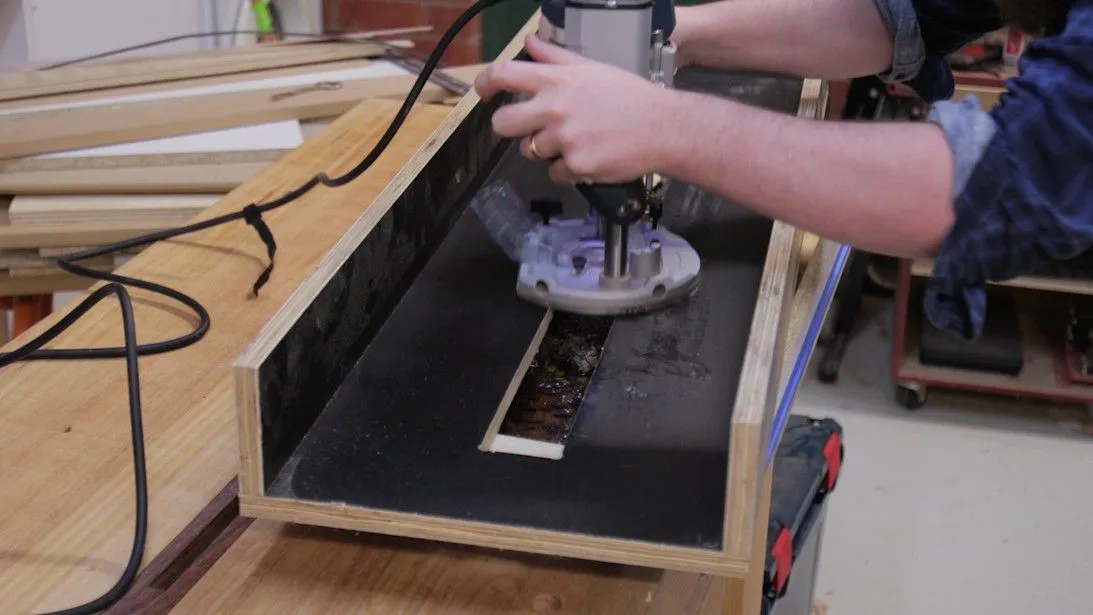
Between the second and third pour of epoxy, I used a router ‘slab flattening jig’ to expose the cross section of the large gumnuts. This jig does not belong to this router, which is why its weird looking
This is a pretty standard slab flattening jig, which I built back when I made my roubo workbench.
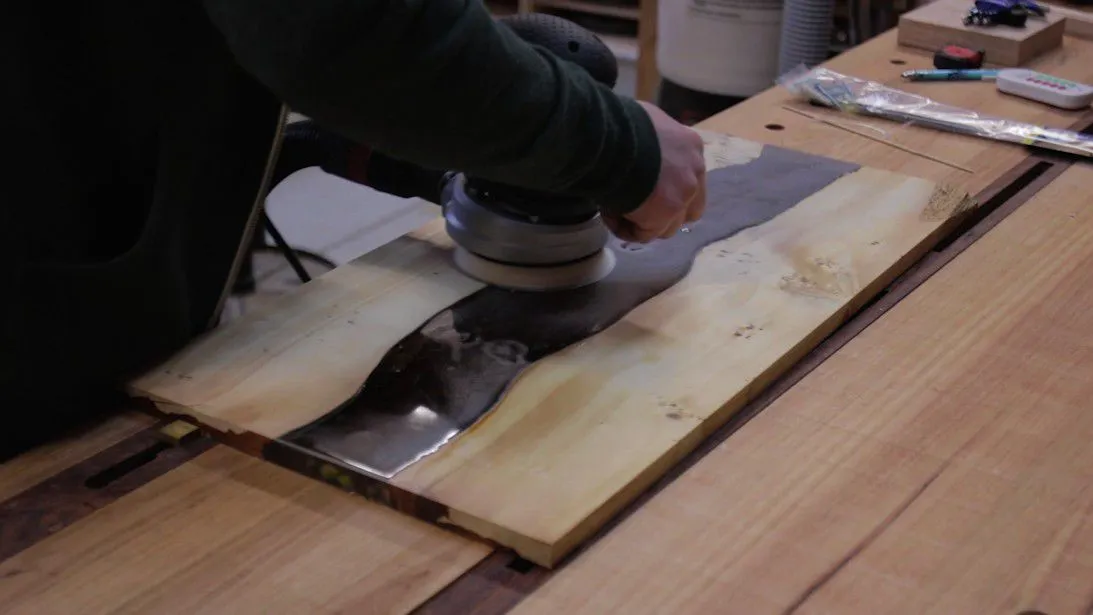
Dry sanding 80,120,180,240,320 grit before I moved onto wet sanding. Some sandpapers are suited to different materials – they’ll all sand whatever, but some excel at certain things. I used SIA’s 1950 discs and they were faster than Abranet for me, when dealing with epoxy. I’m *sure* there are others that work just as well, maybe even better, but this is what I have on hand. Vacuum between each grit so you’re sanding the work piece, not the dust.
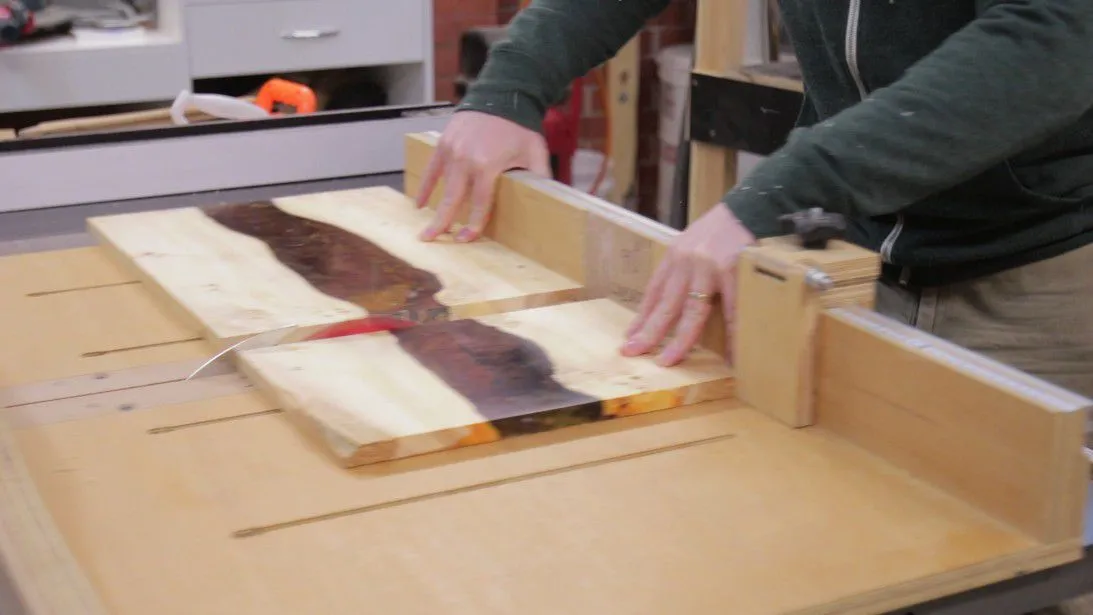
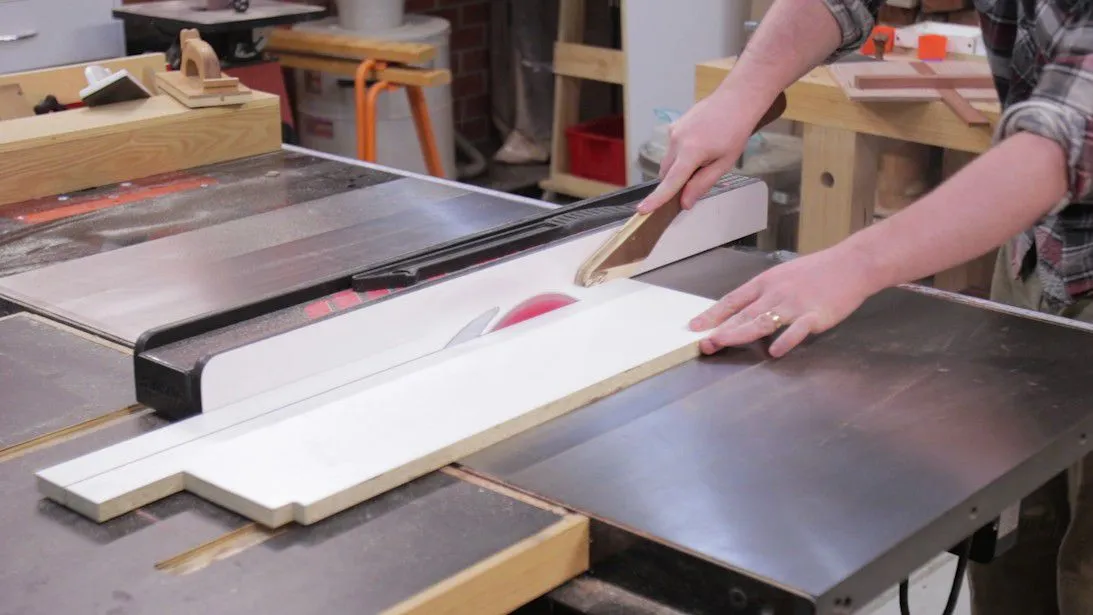
Cutting the slab into three using a crosscut sled
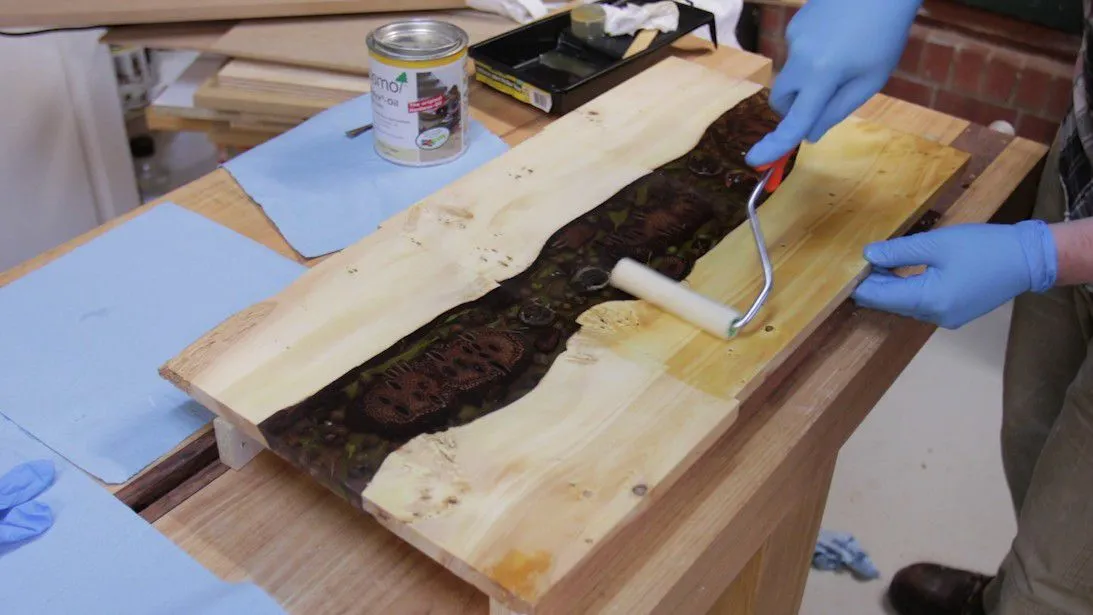
Adding finish. I use OSMO Poly X satin, which can be applied with a roller, brush, or wiped on. This really brings out the golden colour of huon pine, but be sure to wipe it down with methylated spirits (denatured alcohol) first, because huon pine is an oily wood.
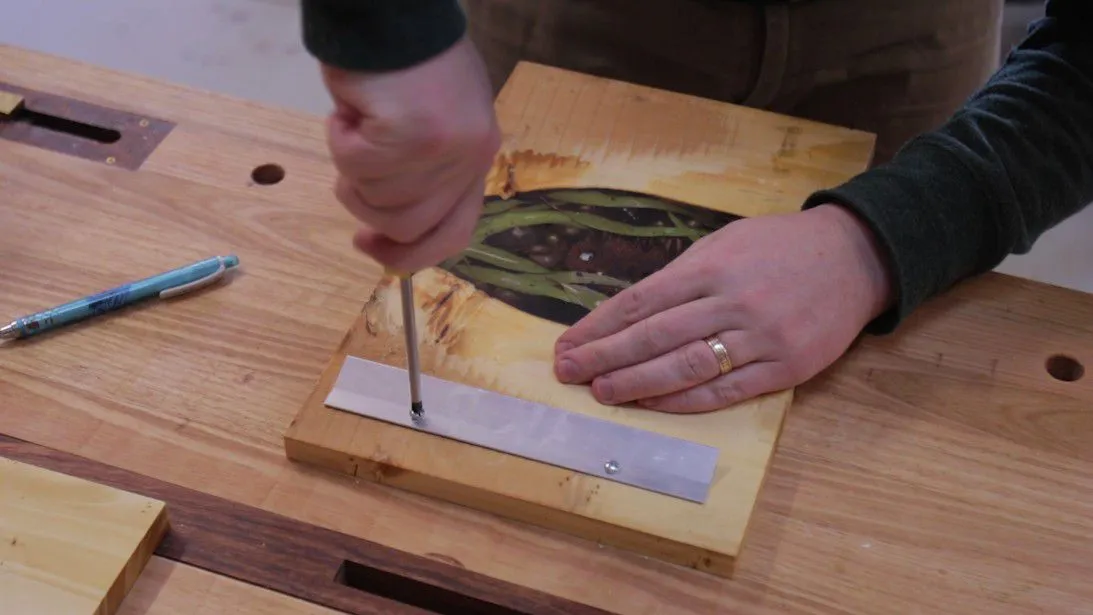
I used “Zennith SureHook Picture Rail” to mount the panels. It was relatively inexpensive and available for Bunnings, comes in several sizes, so the largest (600mm) cut on the mitre saw was the best choice. It’s a glorified (but thin) French Cleat. One part screws onto the back of the panel-
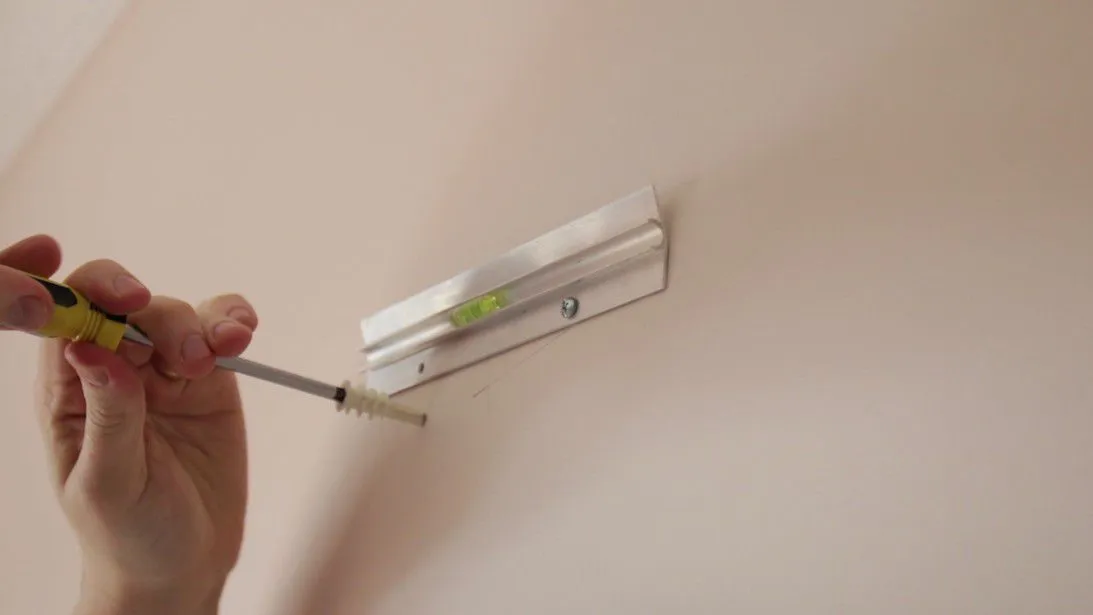
-the other part screws into the wall. These plaster wall plugs just go straight in with a screwdriver, no need to drill. Apparently holds 60kg. It even comes with an included/hilarious bubble level. Worked well, but adorably sized.
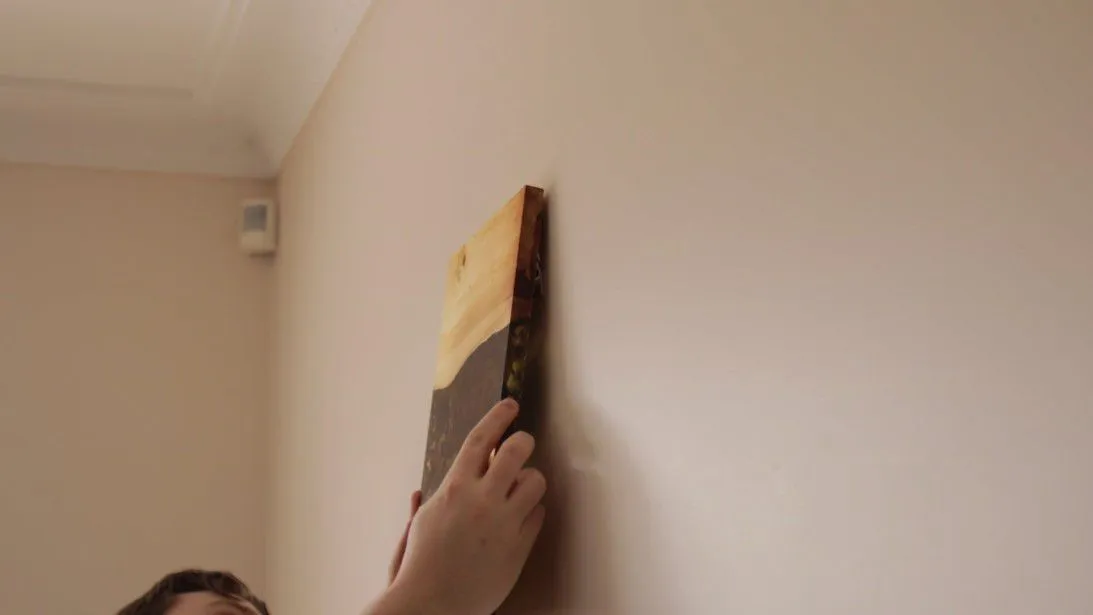
-then just slide the two parts over each other.